Using LiLi to create a Bootable, Portable and Virtualized USB Drive:
LinuxLive USB Creator, or “LiLi”, is a quick way to create Live Linux USB drives that are persistent virtualized drives. Typically, Linux USB drives require rebooting to install software. It is possible to create a Linux USB drive that will install without a reboot. This is where LiLi comes into play. By setting drive persistence for the USB, you are able to save files and settings on the USB which would normally be lost once the Linux USB drive is dismounted. Creating Linux USB drives is not an unfamiliar subject, but using LiLi is different. It is the feature of drive persistence that makes this method unique. There is also the ability to open your Linux OS in Windows with a portable version of VirtualBox.
Download and install the latest version of LiLi from the link that follows.
Follow all of the steps in the installer and click Finish at the end. Check the box to “Run LinuxLive USB Creator”. The application will launch and you can get started if you already have the LinuxLive ISO downloaded or on CD/DVD.
If you do not have a Linux ISO downloaded or on CD/DVD, you will need to download the ISO first. There is no need to burn it to a CD or DVD unless you want a hard copy. You can download it to your hard drive and LiLi can access it from there. Not all versions of Linux are compatible with LinuxLive USB Creator. Ubuntu, Knoppix, and LinuxMint are good LinuxLive options. One that works very well with this method is Fedora. A link to download the Fedora ISO is included here. Unlike many of the Linux ISO downloads, this one does not take long to download and is definitely compatible with LiLi. (check out Distrowatch’s list of major distributions for other downloads)
At the LiLi interface, you will find that it is broken down into 5 steps. Just follow the steps in the order listed to install Linux to your USB drive. The first step is to choose the USB drive or other portable USB device for installation.

If the volume is formatted in NTFS, you will later need to format it in FAT32. We will get to that, but you may as well format your USB in FAT32 before starting. In step 2 you will choose whether to use an existing ISO/IMG/Zip file, CD, or tow download an ISO from supported distributors.

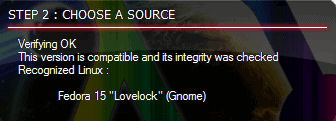
LiLi will then check the ISO to ensure that it is a good file and is compatible.

In step 3, you set the amount of space for drive persistence. This is how you will be able to save files and installed programs between reboots. This does take up drive space, but it is well worth it to have the persistence. The larger the capacity of the USB drive, the better if you will be adding many programs and files.

In step 4, enable Launching LinuxLive in Windows and this will download portable VirtualBox to the USB. If the USB drive is already formatted in FAT32, you can leave that box unchecked. If it is formatted in NTFS, check the box to format in FAT32. Click the lightning bolt image in step 5 and the drive will be created. When it is complete, you will see the sign of success:
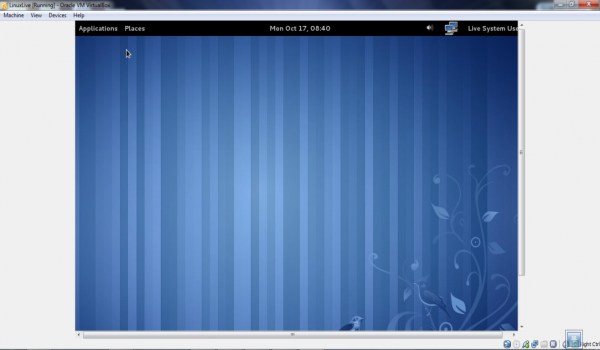
To use your new LinuxLive key, open Windows Explorer and open the USB drive, double-click VirtualBox\Virtualize_this_key.exe and portable VirtualBox will be launched and your installed version of Linux will open.

© Melanie Gross for gHacks Technology News | Latest Tech News, Software And Tutorials, 2011. | Permalink |
Add to del.icio.us, digg, facebook, reddit, twitter
Post tags: Linux, usb bootable, virtualbox, windows software
LinuxLive USB Creator, or “LiLi”, is a quick way to create Live Linux USB drives that are persistent virtualized drives. Typically, Linux USB drives require rebooting to install software. It is possible to create a Linux USB drive that will install without a reboot. This is where LiLi comes into play. By setting drive persistence for the USB, you are able to save files and settings on the USB which would normally be lost once the Linux USB drive is dismounted. Creating Linux USB drives is not an unfamiliar subject, but using LiLi is different. It is the feature of drive persistence that makes this method unique. There is also the ability to open your Linux OS in Windows with a portable version of VirtualBox.
Download and install the latest version of LiLi from the link that follows.
Follow all of the steps in the installer and click Finish at the end. Check the box to “Run LinuxLive USB Creator”. The application will launch and you can get started if you already have the LinuxLive ISO downloaded or on CD/DVD.
If you do not have a Linux ISO downloaded or on CD/DVD, you will need to download the ISO first. There is no need to burn it to a CD or DVD unless you want a hard copy. You can download it to your hard drive and LiLi can access it from there. Not all versions of Linux are compatible with LinuxLive USB Creator. Ubuntu, Knoppix, and LinuxMint are good LinuxLive options. One that works very well with this method is Fedora. A link to download the Fedora ISO is included here. Unlike many of the Linux ISO downloads, this one does not take long to download and is definitely compatible with LiLi. (check out Distrowatch’s list of major distributions for other downloads)
At the LiLi interface, you will find that it is broken down into 5 steps. Just follow the steps in the order listed to install Linux to your USB drive. The first step is to choose the USB drive or other portable USB device for installation.

If the volume is formatted in NTFS, you will later need to format it in FAT32. We will get to that, but you may as well format your USB in FAT32 before starting. In step 2 you will choose whether to use an existing ISO/IMG/Zip file, CD, or tow download an ISO from supported distributors.

LiLi will then check the ISO to ensure that it is a good file and is compatible.

In step 3, you set the amount of space for drive persistence. This is how you will be able to save files and installed programs between reboots. This does take up drive space, but it is well worth it to have the persistence. The larger the capacity of the USB drive, the better if you will be adding many programs and files.

In step 4, enable Launching LinuxLive in Windows and this will download portable VirtualBox to the USB. If the USB drive is already formatted in FAT32, you can leave that box unchecked. If it is formatted in NTFS, check the box to format in FAT32. Click the lightning bolt image in step 5 and the drive will be created. When it is complete, you will see the sign of success:
To use your new LinuxLive key, open Windows Explorer and open the USB drive, double-click VirtualBox\Virtualize_this_key.exe and portable VirtualBox will be launched and your installed version of Linux will open.

© Melanie Gross for gHacks Technology News | Latest Tech News, Software And Tutorials, 2011. | Permalink |
Add to del.icio.us, digg, facebook, reddit, twitter
Post tags: Linux, usb bootable, virtualbox, windows software
Nenhum comentário:
Postar um comentário