Pular para o conteúdo principal

Boot From a USB Drive Even if your BIOS Won’t Let You

Excelente artigo explicando a forma de como ultrapassar o problema de realizar um boot apartir de uma pen USB quanda a Bios do computador não o permite.

Boot From a USB Drive Even if your BIOS Won’t Let You: "
You’ve always got a trusty bootable USB flash drive with you to solve computer problems, but what if a PC’s BIOS won’t let you boot from USB? We’ll show you how to make a CD or floppy disk that will let you boot from your USB drive.

sshot-1


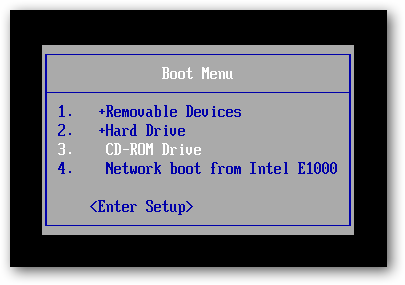
This boot menu, like many created before USB drives became cheap and commonplace, does not include an option to boot from a USB drive.

A piece of freeware called PLoP Boot Manager solves this problem, offering an image that can burned to a CD or put on a floppy disk, and enables you to boot to a variety of devices, including USB drives.

Put PLoP on a CD

PLoP comes as a zip file, which includes a variety of files. To put PLoP on a CD, you will need either plpbt.iso or plpbtnoemul.iso from that zip file. Either disc image should work on most computers, though if in doubt plpbtnoemul.iso should work “everywhere,” according to the readme included with PLoP Boot Manager.

Burn plpbtnoemul.iso or plpbt.iso to a CD and then skip to the “booting PLoP Boot Manager” section.

Put PLoP on a Floppy Disk

If your computer is old enough to still have a floppy drive, then you will need to put the contents of the plpbt.img image file found in PLoP’s zip file on a floppy disk.

To do this, we’ll use a freeware utility called RawWrite for Windows.

sshot-6

We aren’t fortunate enough to have a floppy drive installed, but if you do it should be listed in the Floppy drive drop-down box. Select your floppy drive, then click on the “…” button and browse to plpbt.img. Press the Write button to write PLoP boot manager to your floppy disk.

sshot-7

Booting PLoP Boot Manager

To boot PLoP, you will need to have your CD or floppy drive boot with higher precedence than your hard drive. In many cases, especially with floppy disks, this is done by default.

If the CD or floppy drive is not set to boot first, then you will need to access your BIOS’s boot menu, or the setup menu. The exact steps to do this vary depending on your BIOS – to get a detailed description of the process, search for your motherboard’s manual (or your laptop’s manual if you’re working with a laptop).

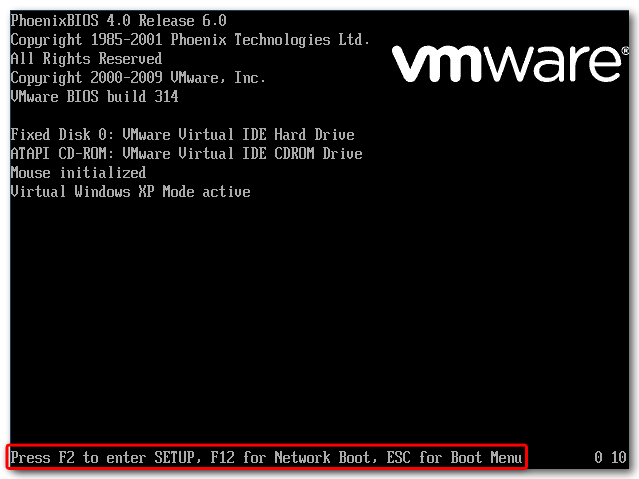
In general, however, as the computer boots up, some important keyboard strokes are noted somewhere prominent on the screen. In our case, they are at the bottom of the screen.

sshot-18

Press Escape to bring up the Boot Menu. Previously, we burned a CD with PLoP Boot Manager on it, so we will select the CD-ROM Drive option and hit Enter.

sshot-2

If your BIOS does not have a Boot Menu, then you will need to access the Setup menu and change the boot order to give the floppy disk or CD-ROM Drive higher precedence than the hard drive. Usually this setting is found in the “Boot” or “Advanced” section of the Setup menu.

sshot-17

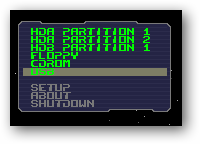
If done correctly, PLoP Boot Manager will load up, giving a number of boot options.

sshot-3

Highlight USB and press Enter.

sshot-4

PLoP begins loading from the USB drive.

sshot-5

Despite our BIOS not having the option, we’re now booting using the USB drive, which in our case holds an Ubuntu Live CD!

sshot-8

This is a pretty geeky way to get your PC to boot from a USB…provided your computer still has a floppy drive. Of course if your BIOS won’t boot from a USB it probably has one…or you really need to update it.

Download PLoP Boot Manager

Download RawWrite for Windows
"

Comentários

Postagens mais visitadas deste blog

Improve Windows Security By Closing Open Ports

Improve Windows Security By Closing Open Ports : " A standard Windows operating system has a number of ports open after installation. Some of these ports are needed for the system to function properly while others might not. These ports can pose a security risk as every open port on a system might be an entry point for a malicious user. A port basically allows communication to or from the device. Characteristics are a port number, an IP address and a protocol type. This article will give you the tools at hand to identify and evaluate the open ports on your Windows system to make a decision in the end whether they can or should be closed or left open. Software programs and tools that we will use: CurrPorts : Available for 32-bit and 64-bit editions of Windows. It is a port monitor that displays all open ports on a computer system. We will use it to identify the ports and the programs that are using them. Windows Task Manager: Also used to identify the programs and link some p

Diagnosing a Blue Screen of Death Error in Windows

Diagnosing a Blue Screen of Death Error in Windows : For many years now the famous Blue Screen of Death (BSoD) has been the ultimate indication that something disastrous has happened to make your computer die, but how useful is the information in the BSoD and the respective crash dump file that Windows produces? The best article I ever found explaining the BSoD in depth is here on the Microsoft website, however it’s quite technical and doesn’t discuss how to actually troubleshoot a problem. The crash dump file is just technical details of what was being held in the computer’s memory at the time of the crash, and this will include details on every driver and service that was loaded, and every piece of software that was running. The most useful pieces of information are to be found on the BSoD itself and are highlighted on the screenshot below. These are the BSoD error name, the stop error code and the name of the driver or service that has failed (this last one might not always appea

Use BGInfo to Build a Database of System Information of Your Network Computers

Use BGInfo to Build a Database of System Information of Your Network Computers : " One of the more popular tools of the Sysinternals suite among system administrators is BGInfo which tacks real-time system information to your desktop wallpaper when you first login. For obvious reasons, having information such as system memory, available hard drive space and system up time (among others) right in front of you is very convenient when you are managing several systems. A little known feature about this handy utility is the ability to have system information automatically saved to a SQL database or some other data file. With a few minutes of setup work you can easily configure BGInfo to record system information of all your network computers in a centralized storage location. You can then use this data to monitor or report on these systems however you see fit. BGInfo Setup If you are familiar with BGInfo, you can skip this section. However, if you have never used this tool, it takes ju